Radiographic Positioning of the Cervical Spine
This article discusses radiographic positioning of the cervical spine for the Radiologic Technologist (X-Ray Tech).
- Cervical Spine PA or AP
- Cervical Spine Lateral
- Cervical Spine Oblique
- Cervical Spine AP Supine
- Cervical Spine AP Fuchs Method
- Cervical Spine PA Judd Method
- Cervical Spine Lateral Supine
- Odontoid Process AP
- Cervicothoracic Region Lateral Twinning Method
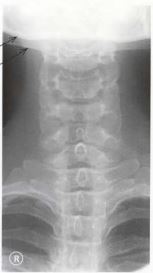
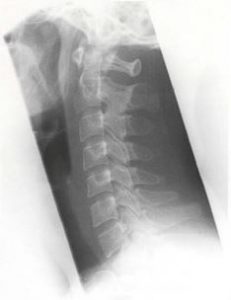
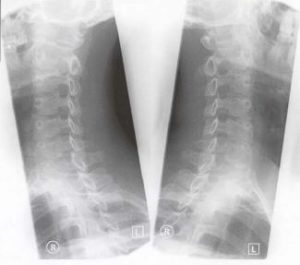
Radiologists consider a cervical spine X-ray to be of good quality when the lateral view shows all 7 cervical vertebrae plus the C7-T1 junction. The density should be appropriate with soft tissues and bony structures well visualized.
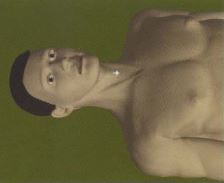
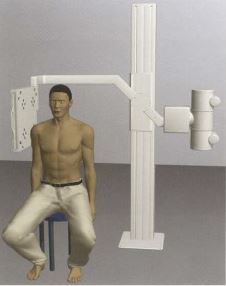
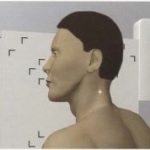
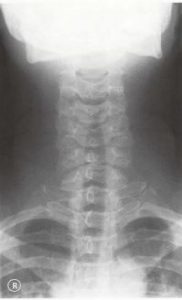
Cervical Spine PA or AP
Purpose and Structures Shown A basic view of the cervical spine.
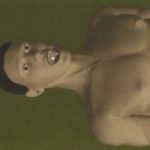
Position of patient Sitting erect.
Position of part Remove necklaces, hair grips, and anything else from the hair. The patient should be asked to place the chin against the cassette holder. The knob at the back of the head should be at the same level as the lower jaw (chin). The patient should be asked to stop breathing when the exposure is taken.
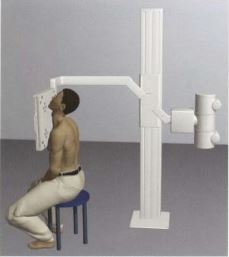
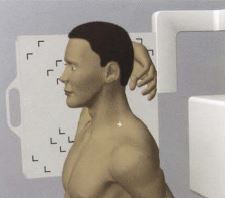
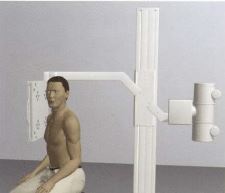
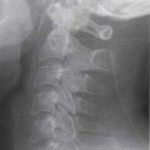
Cervical Spine Lateral
Purpose and Structures Shown A basic view of the cervical spine.
Position of patient Sitting erect.
Position of part Remove necklaces, hair grips, and anything else from the hair. The patient should be positioned with the shoulder against the cassette holder. The arms should be by the sides and the shoulders should be as low as possible. In uninjured patients, a 1 kg (2 lb) weight should be placed in each hand. The patient should be asked to stop breathing when the exposure is taken.
Video Credit : CentralazRAD
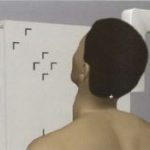
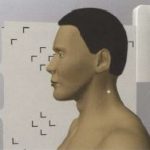
Cervical Spine Oblique
Purpose and Structures Shown An additional view of the cervical spine.
Position of patient Sitting erect. This view is not used for children.
Position of part Remove necklaces, hair grips, and anything else from the hair. The patient should be positioned so that he or she is at a 45-degree angle to the cassette holder. The patient should be asked to stop breathing when the exposure is taken. The patient should be turned to the other side for the other oblique view and the process repeated.
Video Credit : Jocelyn Caldwell
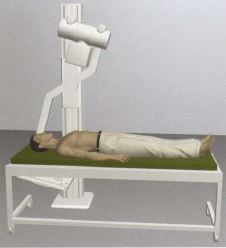
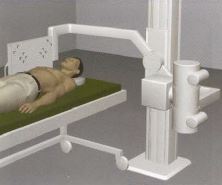
Cervical Spine AP Supine
Purpose and Structures Shown An additional view of the cervical spine for patients with injuries.
Position of patient Supine. This view is used in patients who cannot sit due to injuries. The vertical beam is angled 15 degrees.
Position of part Remove necklaces, hair grips, and anything else from the hair. The tube should be angled at 15 degrees. The patient should be asked to stop breathing when the exposure is taken.
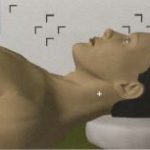
Cervical Spine AP Fuchs Method
Purpose and Structures Shown An additional view to demonstrate the dens in the foramen magnum. This position is NOT to be attempted in patients with fracture or degenerative disease of the upper cervical spine.
Position of patient Supine. The midsagittal plane of the body is centered and perpendicular to the grid. The patient’s arms are placed by the side of the body and the shoulders are flat on the table. A support may be placed under the knees for comfort. The neck is extended until the tips of the chin and mastoid process are oriented vertically.
Position of part The gonads are shielded. The patient is asked to suspend respiration when the exposure is taken. The dens should be clearly demonstrated in the foramen magnum. The mandible, cranium, and vertebrae should be symmetric.
Cervical Spine PA Judd Method
Purpose and Structures Shown An additional view to demonstrate the dens and atlas through the foramen magnum. This position is NOT to be attempted in patients with suspected or known fractures or degenerative disease of the upper cervical spine.
Position of patient Prone. The midsagittal plane of the body is centered and perpendicular to the grid. The patient’s elbows are flexed and the arms are placed in a comfortable position with the shoulders in the same horizontal plane. The neck is extended and the tip of the chin rests on the table.
Position of part The gonads are shielded. The patient is asked to suspend respiration when the exposure is taken. The entire dens should be clearly demonstrated in the foramen magnum along with the anterior and posterior atlas arches. There should be no rotation of the head and neck.
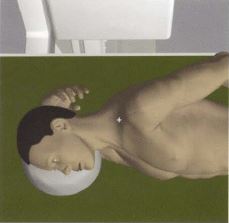
Cervical Spine Lateral Supine
Purpose and Structures Shown An additional lateral projection of the cervical spine for patients with injuries.
Position of patient Supine. The arms are by the side of the body and the shoulders are flat on the table. This view is used in patients who cannot sit due to injuries. A supporting sponge or pad may be placed under the head provided there is no trauma to the neck. If there is suspicion of neck injury or fracture, the head should not be lifted onto a pad without a doctor’s permission. The beam is horizontal.
Position of part Remove necklaces, hair grips, and anything else from the hair. The gonads are shielded. The patient’s head is supported by a pad and kept in a position that is least painful for the patient. The patient’s shoulders are lowered – this may be accomplished by asking a person accompanying the patient to pull the patient’s arms downwards. This person should wear a lead apron and lead gloves. The patient should be asked to stop breathing when the exposure is taken.
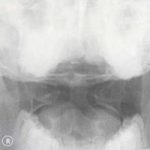
Odontoid Process AP
Purpose and Structures Shown An additional view of the first and second cervical vertebrae through an open mouth.
Position of patient Supine. The beam is vertical and angled at 10 degrees.
Position of part Remove necklaces, hair grips, and anything else from the hair. The patient should be asked to open the mouth as wide as possible. A wedge of cork or soft wood may be placed between the upper and lower rows of teeth if the patient cannot keep the mouth open. The patient should be asked to stop breathing when the exposure is taken.

Video Credit : Gurnick Lab
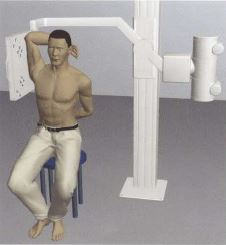
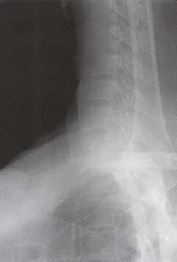
Cervicothoracic Region Lateral Twinning Method
Purpose and Structures Shown An additional view of the cervicothoracic region also known as the swimmer’s lateral projection.
Position of patient Sitting erect. The patient may be positioned lying on one side if needed. This view is seldom used in patients under the age of 16. The arm adjacent to the grid is elevated and flexed at the elbow and resting on the head. The other shoulder is lowered as much as possible.
Position of part A true lateral position is required with the midsagittal plane parallel to the IR. The gonads are shielded. The patient is asked to stop breathing when the exposure is taken. The image demonstrates the lower cervical and upper thoracic vertebrae, approximately up to T4, with the shoulders separated.